Kindred SDK with React Native
🚀 Kindred SDK integration into a React Native application
![]()
![]()
About
This is a guide on how to integrate the Kindred SDK into your React Native application.
For any questions or support with your integration, or to receive your API details, please email sdksupport@kindredteam.com
Setup
iOS
⚠️ You must have Xcode installed (Tested on version 13.0)
- Download the Xcode Kindred Safari Template
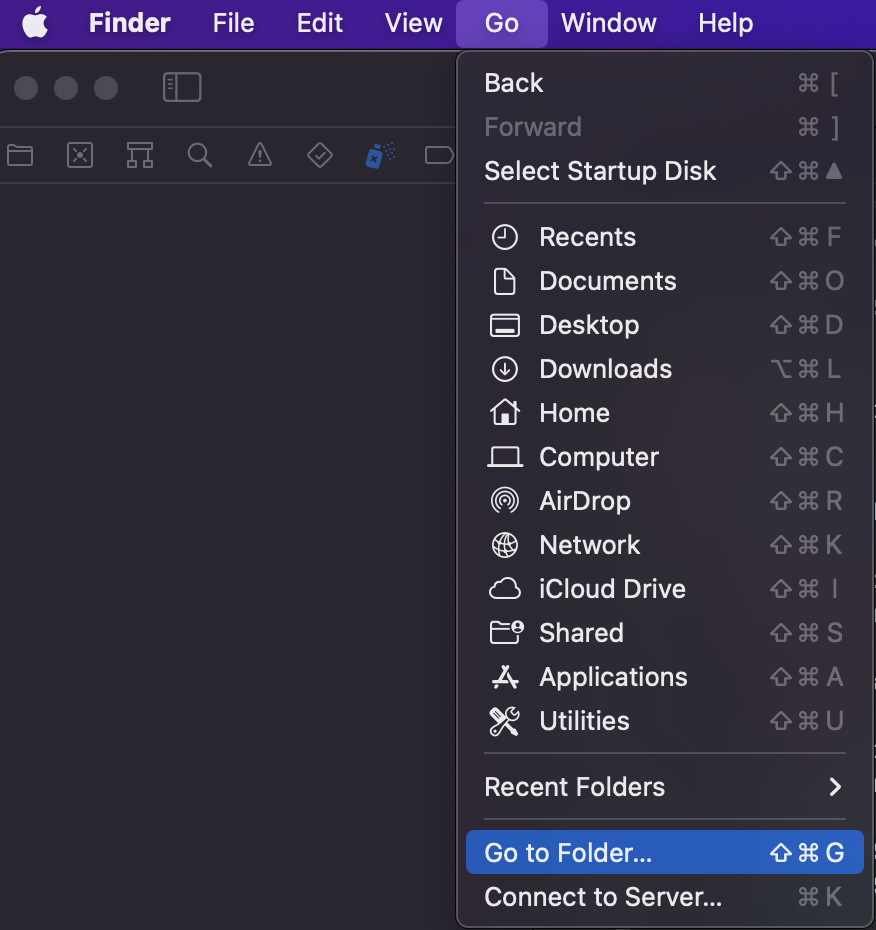
- Navigate to your Xcode folder: Open new Finder window. Then go to Go -> Go to Folder and type
~/Library/Developer/Xcode
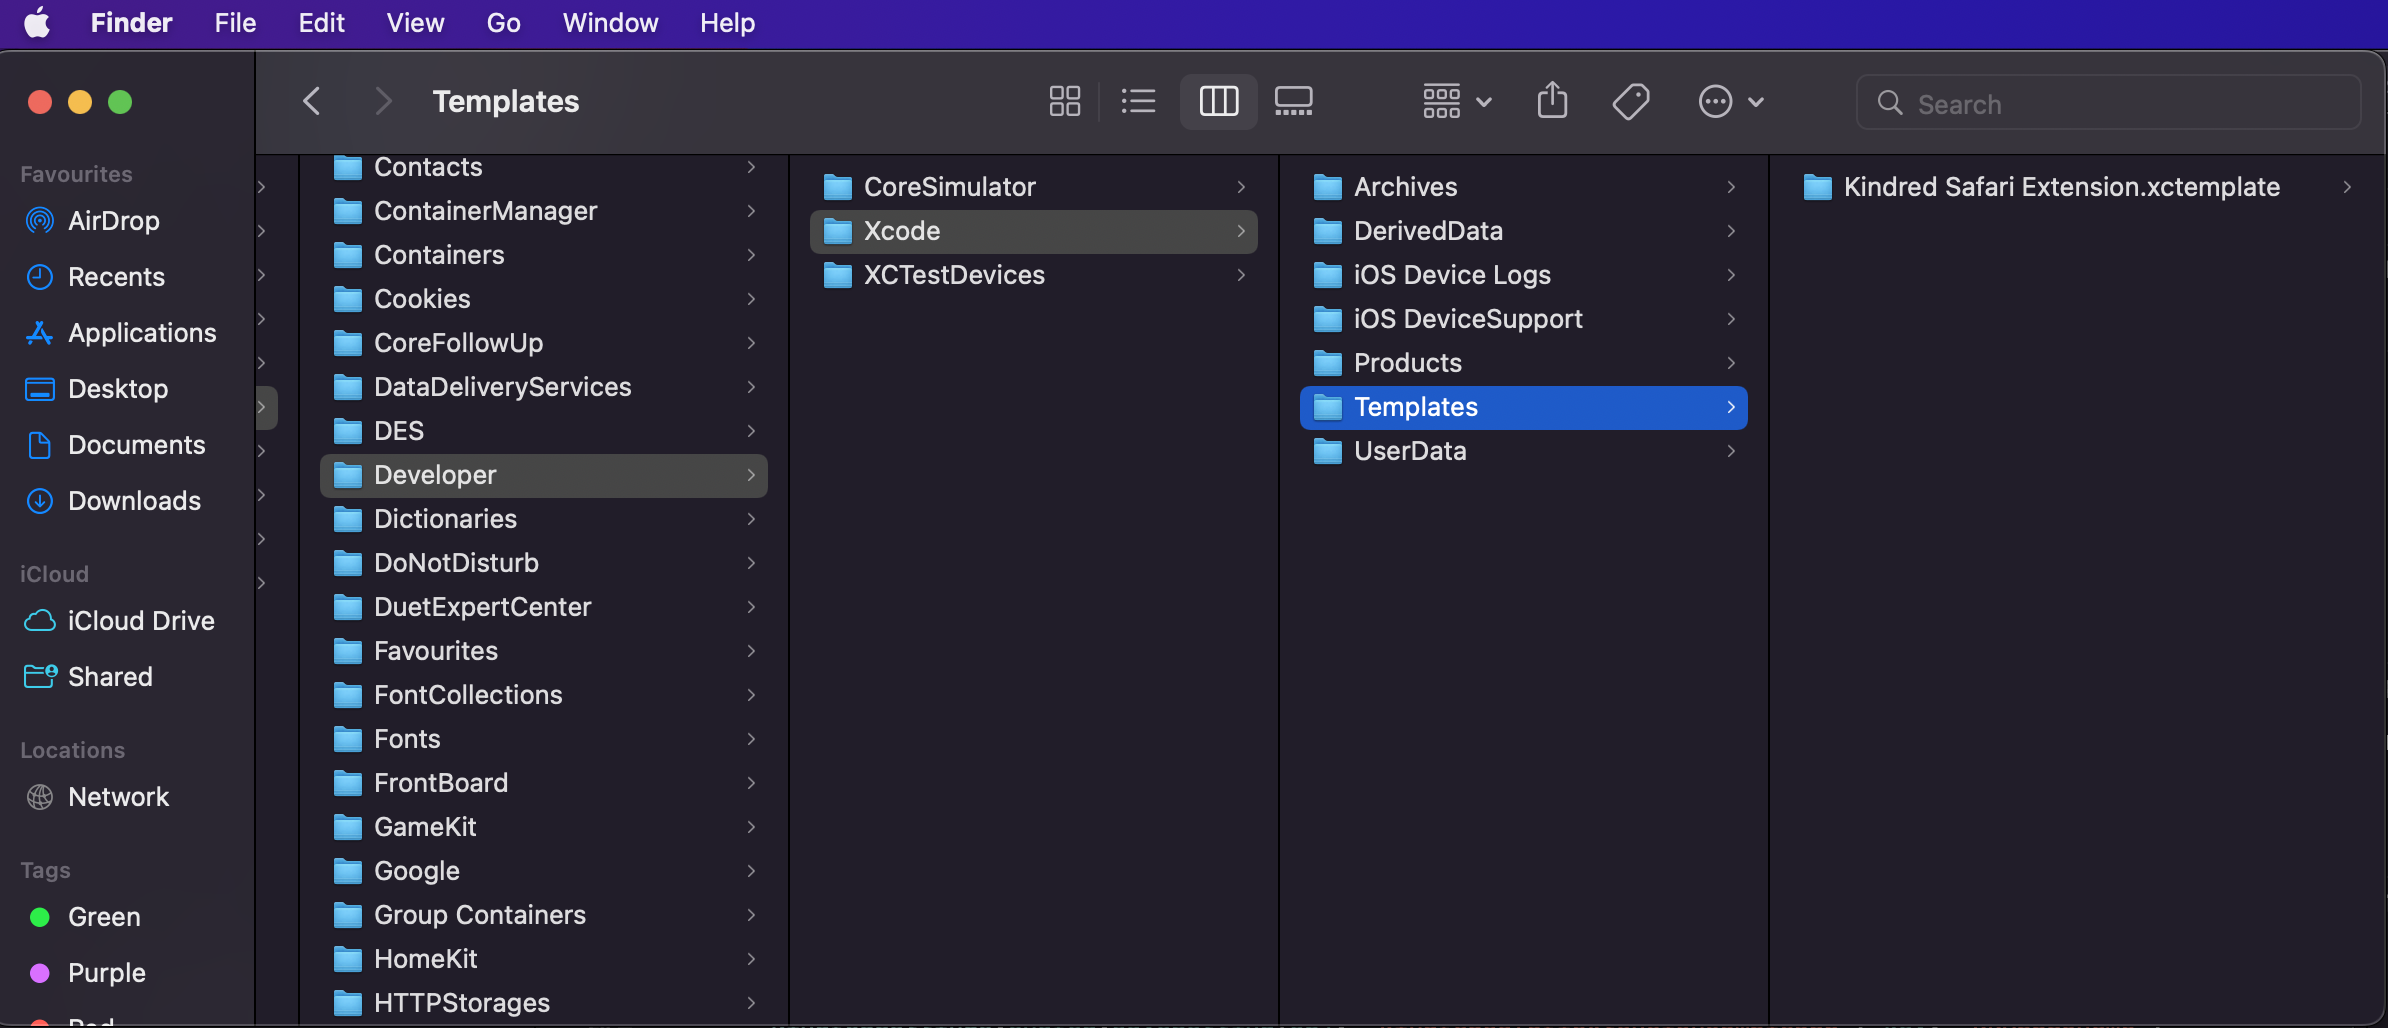
- Create a new folder called
Templates, Copy across theKindred Safari Extension.xctemplateto your newly created folder
- Open your Xcode iOS project, Select File -> New -> Target
You should now see the Kindred Safari Extension under templates
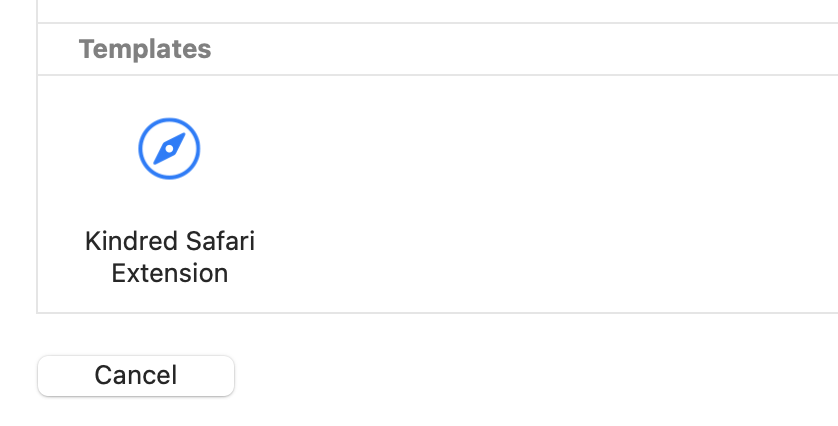
- Create a new Kindred Safari Extension
-
Update the name and description of your extension
-
You can update the name and description from the file
/Resources/_locales/en/messages -
Update the required logos found in
/Resources/icons
- Set your Kindred credentials
- Open the info.plist of your extension, and set your Kindred credentials. Note, you need to set your CLIENT_ID, CLIENT_SECRET and SHARED_KEY.
⚠️ To get your Kindred credentials, please contact sdksupport@kindredteam.com.
- You will now need to set up app groups within your Apple developer account.
To create a new App Group, do the following:
- Visit Apple's iOS Developer Centre, open your Account and log in.
- Select Certificates, IDs & Profiles.
- Under Identifiers select App Groups and click the + button to create a new group.
- Enter a Name and an Identifier for the new group and click the Continue button:
- Click the Register button to create the group and the Done to return to the list of registered App Groups.
- Now, back in Xcode, go to the Project Navigator -> Select your applications target -> Head to the Signing and Capabilities tab -> Click the + button and search for groups. Add an App Group.

- Under the App groups click the add button and will be prompted to select the development team

- Add the group Identifier that you created on step 7 and click OK

- Now head to your Kindred Extension target generated from the template and repeat step 8,9,10

- Head to your application info.plist and add a key for AppGroupName with a string value matching the group name you created in step 7.

- Now head to the Kindred extension info.plist generated from the template and add a key for AppGroupName with the same string value as step 7.

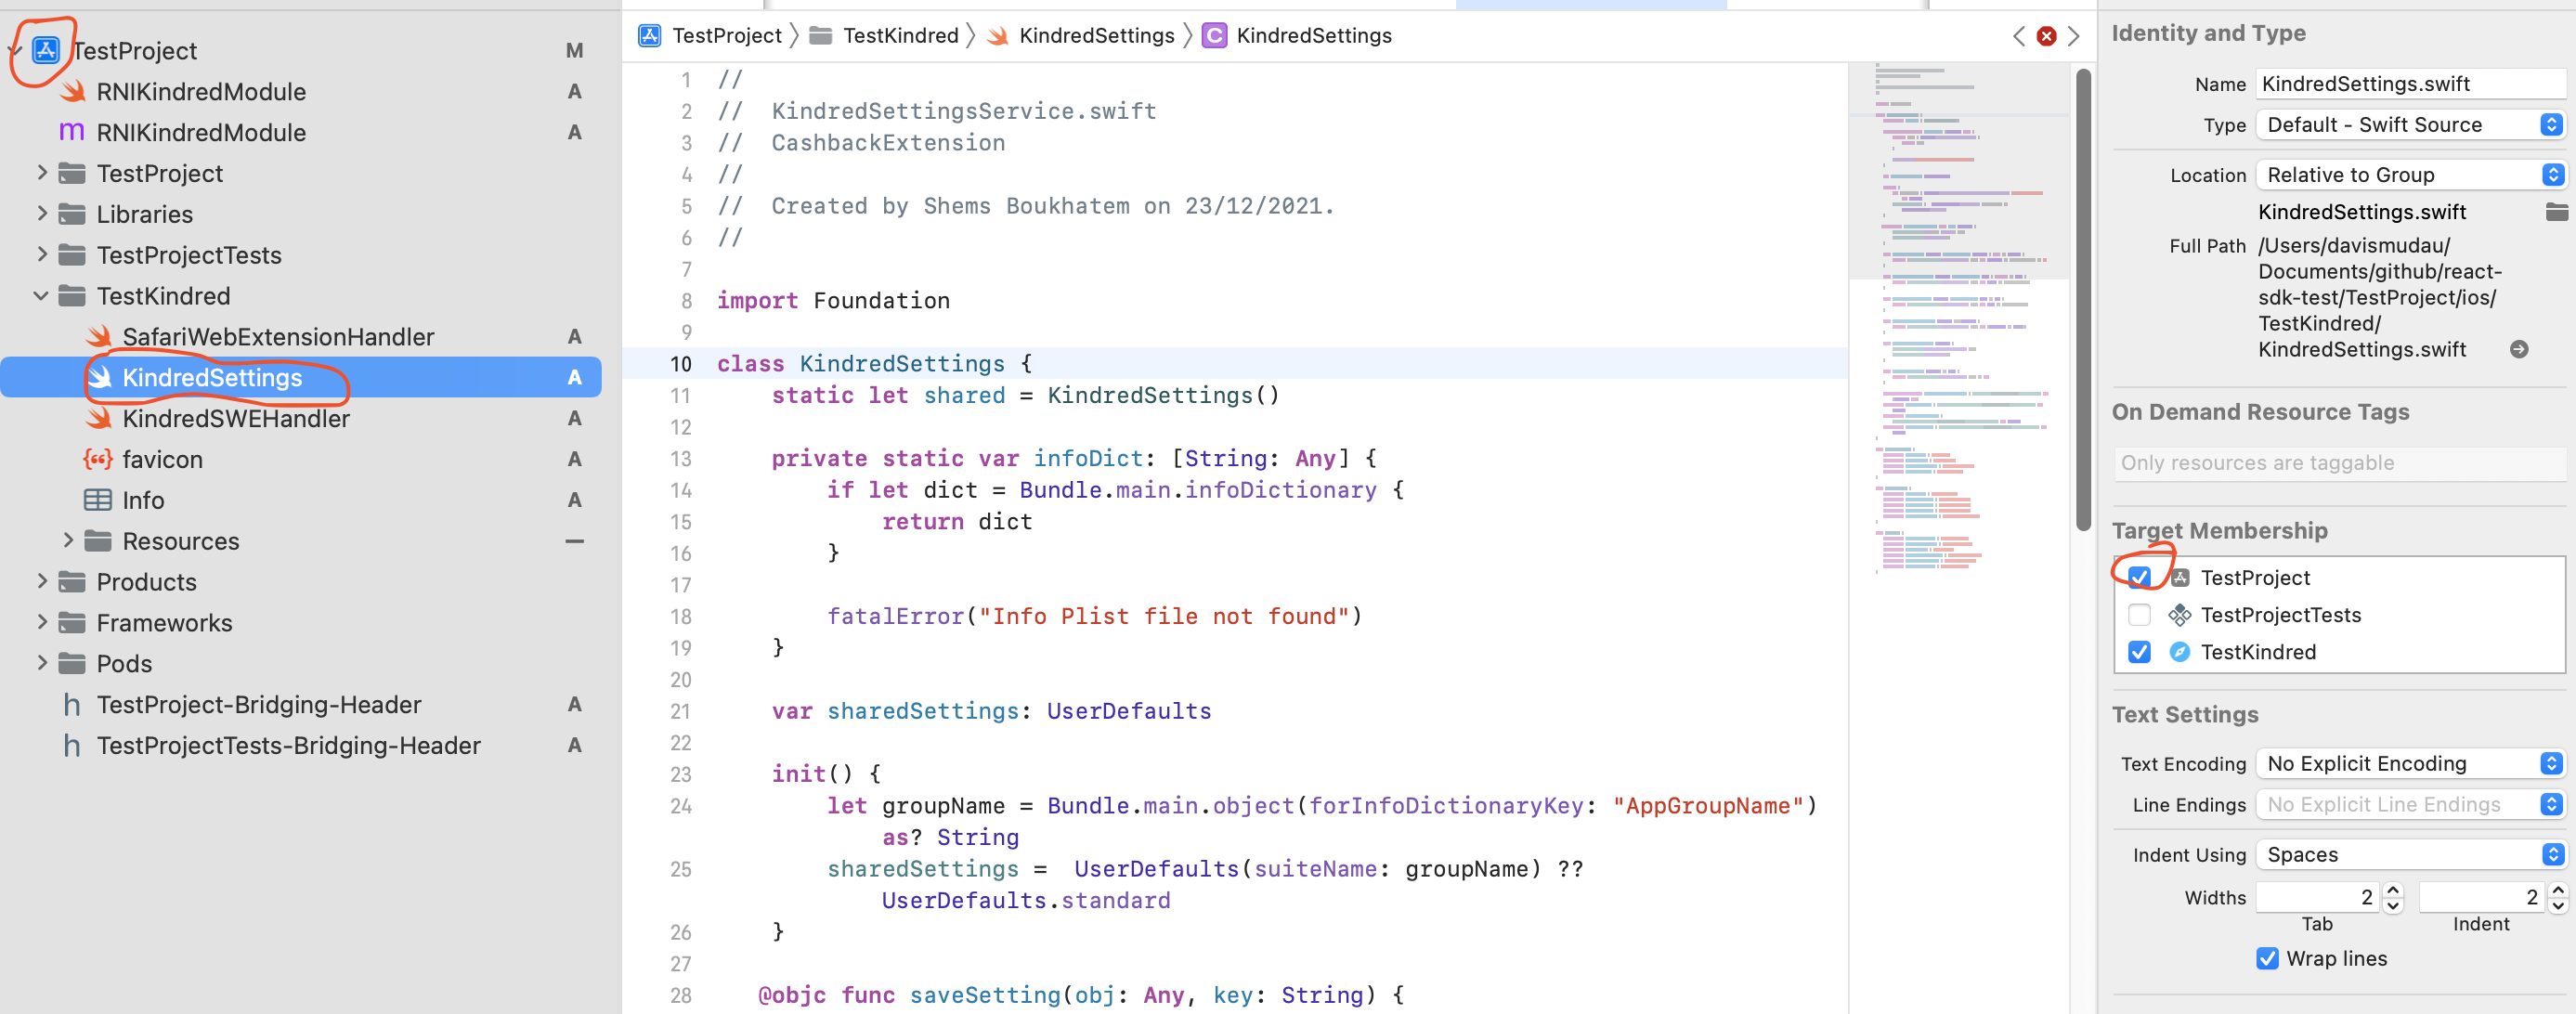
- Make sure on the template generated folder under your project, when you click the
KindredSettings.swifttheTarget membershipon the right has your project checked on Xcode:
- Right click your Project Name on Xcode and select new file
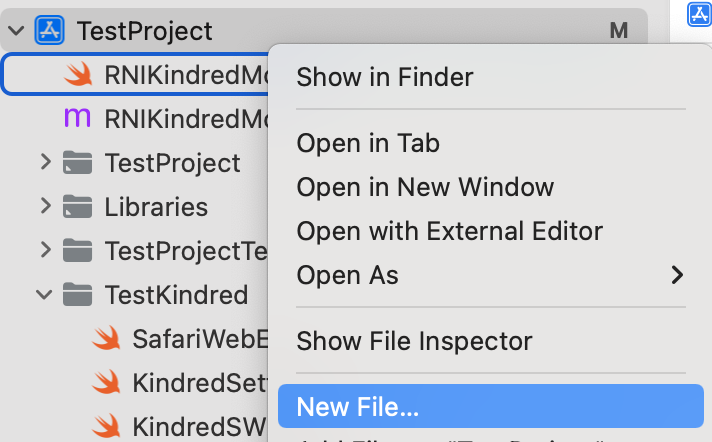
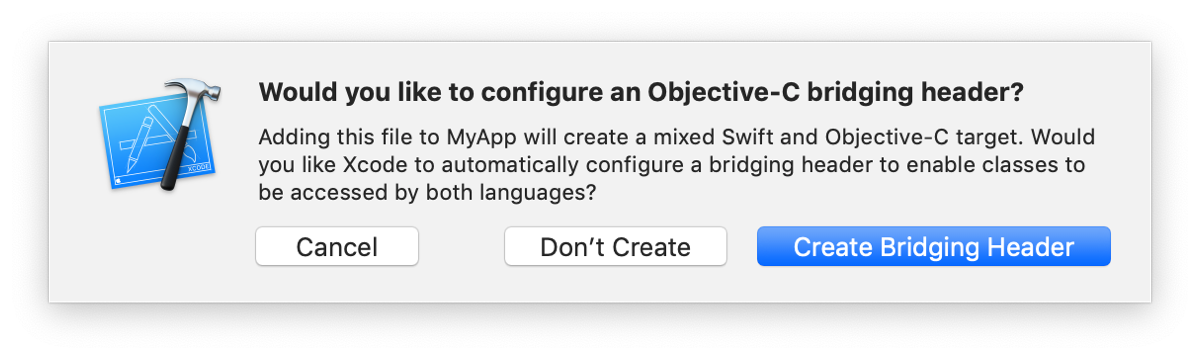
- Create a new Swift file named
RNIKindredModule.swiftand will be prompt to create a header bridge file click onCreate Bridging Header
- Paste the following on the
RNIKindredModule.swiftfile:
import Foundation

@objc(RNIKindredModule)
class RNIKindredModule: NSObject {

  @objc
  func setUserId(_ userId: String){
    KindredSettings.shared.saveSetting(obj: userId, key: "KKUserId")
  }

  @objc
  func setUrlSchemeKey(_ urlScheme: String){
    KindredSettings.shared.saveSetting(obj: urlScheme, key: DataKey.KKAppSchemeKey)
  }

  @objc func setUserCurrencyCode(_ currencyCode: String){
    KindredSettings.shared.saveSetting(obj: currencyCode, key: DataKey.KKUserCurrencyKey)
  }

  @objc func setUserCountryCode(_ countryCode: String){
    KindredSettings.shared.saveSetting(obj: countryCode, key: DataKey.KKUserCountryKey)
  }

  @objc func setShowEarningsConfirmationMessage(_ enabled: Bool) {
    KindredSettings.shared.saveSetting(obj: enabled, key: DataKey.KKShowEarningsConfirmationMessageKey)
  }

  @objc func setShowCashbackLabel(_ enabled: Bool) {
      KindredSettings.shared.saveSetting(obj: enabled, key: DataKey.KKShowCashbackLabelKey)
  }

  @objc func setShowEarthmark(_ enabled: Bool) {
      KindredSettings.shared.saveSetting(obj: enabled, key: DataKey.KKShowEarthmarkKey)
  }

  @objc func setUseAnalytics(_ enabled: Bool) {
      KindredSettings.shared.saveSetting(obj: enabled, key: DataKey.KKUseAnalytics)
  }

  @objc func isExtensionFirstTimeInstall(_ callback: RCTResponseSenderBlock){
    callback( [KindredSettings.shared.IsExtensionFirstTimeInstall() ] )
  }

}
- Follow step 15 and create a new Objective C file named
RNIKindredModule.mand paste the following:
#import <React/RCTBridgeModule.h>

@interface RCT_EXTERN_MODULE(RNIKindredModule, NSObject)
RCT_EXTERN_METHOD(setUserId:(NSString)userId)
RCT_EXTERN_METHOD(setUrlSchemeKey:(NSString)urlScheme)
RCT_EXTERN_METHOD(setUserCurrencyCode:(NSString)currencyCode)
RCT_EXTERN_METHOD(setUserCountryCode:(NSString)countryCode)
RCT_EXTERN_METHOD(setShowEarningsConfirmationMessage:(BOOL *)enabled)
RCT_EXTERN_METHOD(setShowCashbackLabel:(BOOL *)enabled)
RCT_EXTERN_METHOD(setShowEarthmark:(BOOL *)enabled)
RCT_EXTERN_METHOD(setUseAnalytics:(BOOL *)enabled)
RCT_EXTERN_METHOD(isExtensionFirstTimeInstall:(RCTResponseSenderBlock *)callback)
@end
- On the Bridge file generated by Xcode namely
<project-name>-Bridging-Header.hadd the following on the file:
#import <React/RCTBridgeModule.h>
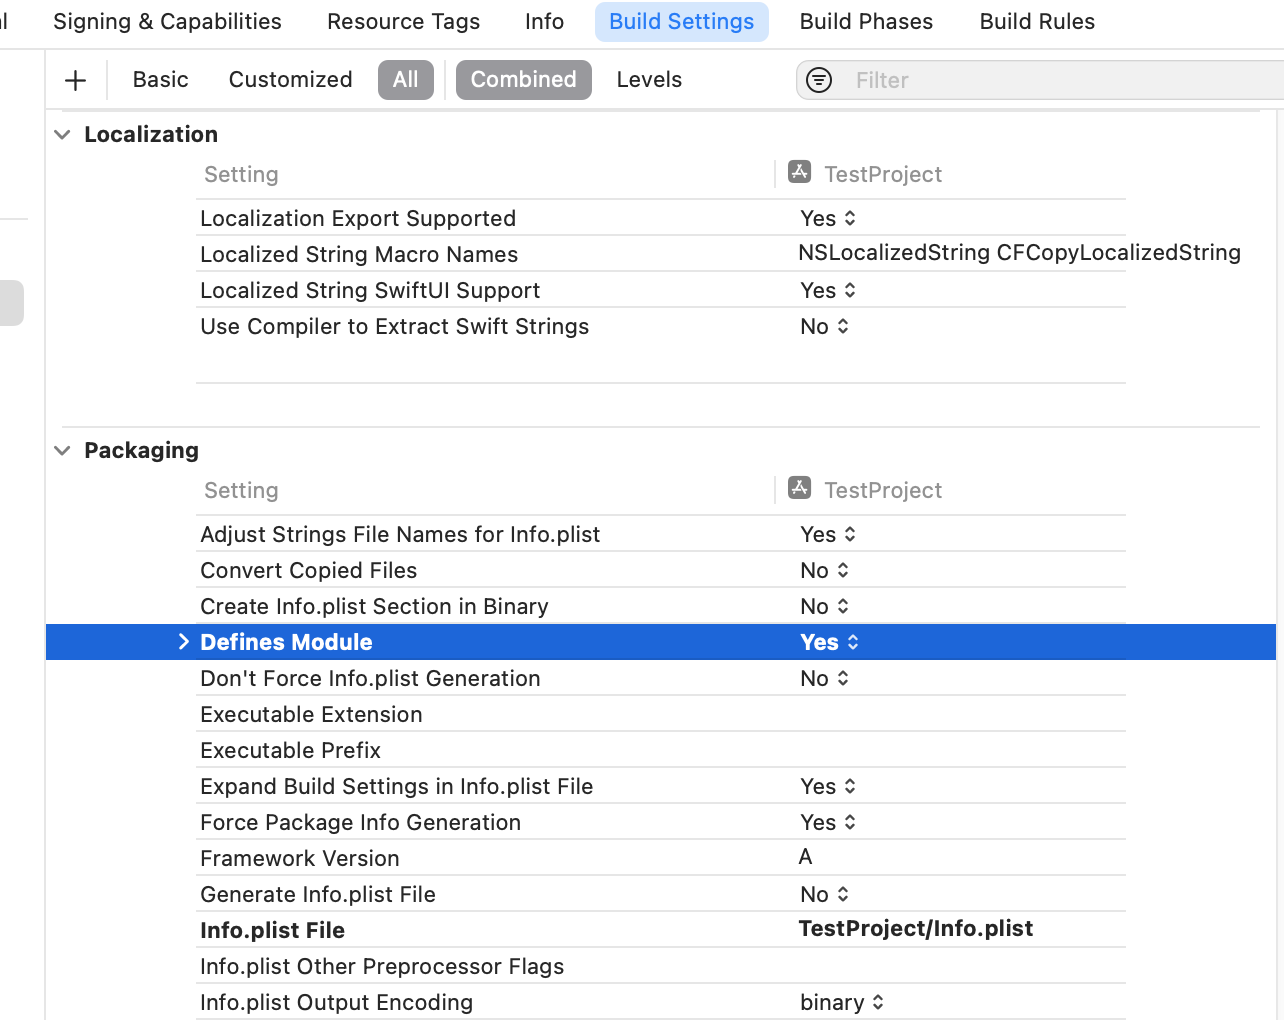
- On your project settings under
Build Settingssearch forDefines Moduleset it to 'Yes'
⚠️ Make sure the All and Combined are selected as on the screenshot
Activation Call-To-Action
-
On your onboarding journey, you can direct the users to a Kindred hosted page with instructions on how to activate the iOS mobile browser plugin.
-
The plugin activation page is: https://sdk.kindred.co/plugin-activation
-
If you would like to make use of our callback that redirects the user back to your app once they're done activating the plugin, you can pass a query parameter origin with the value of the URL scheme of your app.
-
https://sdk.kindred.co/plugin-activation?origin=YOUR_URL_SCHEME
-
For example, if your url scheme is kindred:// then you will use the link https://sdk.kindred.co/plugin-activation?origin=kindred
-
To learn more about URL scheme, please visit:Defining a custom url scheme for your app
Android
⚠️ AndroidX needs to be enabled for the SDK to work in your application
- edit your
android/app/build.gradlefile:
apply plugin: "kotlin-android"  // Add this at the top only if you don't have Kotlin setup

dependencies {
  // …

   implementation "io.github.kindred-app:browser-sdk:3.1.0" // Add this line
   implementation "org.jetbrains.kotlin:kotlin-stdlib:$kotlin_version" // Add this only if you don't have Kotlin setup

  // …
- Edit your
android/app/src/main/res/values/strings.xmlfile:
<resources>
  <!-- Add the following (Note, you can change these values as applicable)   -->

    <string name="accessibility_service_description">By allowing the Accessibility Permission, you permit “App Name” to access data about your URLs. We do this to enable you to save money when you are shoppingon your favourite brands, coupon codes will pop up at checkout, helping you to save!</string>
    <string name="accessibility_service_label">Kindred</string>

</resources>
- Create file
accessibilityservice.xmlonandroid/app/src/main/res/xmlpath and add the following:
  <!--Note if the /xml path does not exist on your project you can add it in -->

  <!-- Copy and paste the following  -->

<accessibility-service xmlns:android="http://schemas.android.com/apk/res/android"
    android:description="@string/accessibility_service_description"
    android:accessibilityEventTypes="typeAllMask"
    android:accessibilityFlags="flagDefault|flagReportViewIds|flagRetrieveInteractiveWindows"
    android:accessibilityFeedbackType="feedbackVisual"
    android:notificationTimeout="100"
    android:canRetrieveWindowContent="true"
    android:settingsActivity="com.example.android.accessibility.ServiceSettingsActivity"
    />
- Add permissions to the
android/app/src/main/AndroidManifest.xmlfile:
    <!-- Copy and paste the following  -->

    <uses-permission android:name="android.permission.INTERNET" />
    <uses-permission android:name="android.permission.SYSTEM_ALERT_WINDOW" />
- Create file
DealsAccessibilityService.ktonandroid/app/src/main/java/compath and add the following:
//  Note: if you are not using the "show earnings" feature, set the feature flag to false. See What is "Show Earnings" feature flag? below.

// paste the following

package com.app.myapp // make sure this matches your package path on your mainApplication.java

import com.kindred.browser_sdk.KindredAbstractAccessibilityService
import com.kindred.browser_sdk.configuration.*

class DealsAccessibilityService : KindredAbstractAccessibilityService() {

    companion object {
        val kindredApiConfiguration = KindredApiConfiguration(
            urlBase = "https://api-partners.kindred.co",
            clientID = "[YOUR_AUTH_CLIENT_ID]",
            clientSecret ="[YOUR_AUTH_CLIENT_SECRET]",
            sharedKey = "[YOUR_AUTH_SHARED_KEY]",
            cdnUrl = "https://cdn.kindred.co"
        )
    }

    override fun configureService() = KindredAccessibilityServiceConfiguration(
        api = kindredApiConfiguration,
        user = KindredUserConfiguration(
            userCurrency = "CURRENCY_CODE",
            userCountry = "COUNTRY_CODE"
        ),
        features = KindredFeaturesConfiguration(
          showEarningsConfirmationMessage = true,
        	earthMarkScoring = true,
          showCashbackLabel = true
        ),
        charity = KindredCharityConfiguration(
            charityId = "CHARITY_ID",
            charityShare = CHARITY_SHARE
        )
    )

    override fun onCreate() {
      	// The default configuration gives each user a unique user ID unless you wish to specify one here
        setUserId("UNIQUE_USER_ID")
        // Note the "[logo]" needs to be changed to your logo see below how to change it
        setAppIcon(R.drawable."[logo]")

        super.onCreate()
    }
}
Find out more about EarthMark and Show Earnings feature flags?
⚠️ Note to change the logo of the accessibility service (defaulted to Kindred logo), add a image to the android/app/src/main/res/drawable folder and change the "[logo]" with the name of the image stored
android/app/src/main/res/drawable folder and change the "[logo]" with the name of the image stored.png")
- Edit your
android/app/src/main/AndroidManifest.xmlfile:
<manifest xmlns:android="http://schemas.android.com/apk/res/android"
  package="com.rnbootsplashexample">

  <!-- … -->

  <application
    android:name=".MainApplication"
    android:label="@string/app_name"
    android:icon="@mipmap/ic_launcher"
    android:roundIcon="@mipmap/ic_launcher_round"
    android:allowBackup="false"
    android:theme="@style/AppTheme">
    <!-- Note Make sure that `com.app.myapp` matches your main application Path -->
    <!-- Copy the following and paste inside your application tag -->
     <service
            android:name="com.app.myapp.DealsAccessibilityService"
            android:canRetrieveWindowContent="true"
            android:exported="true"
            android:label="@string/accessibility_service_label"
            android:permission="android.permission.BIND_ACCESSIBILITY_SERVICE">
            <intent-filter>
                <action android:name="android.accessibilityservice.AccessibilityService" />
            </intent-filter>
            <meta-data
                android:name="android.accessibilityservice"
                android:resource="@xml/accessibilityservice" />
             </service>
    <!-- … -->
  </application>
</manifest>
- Create file
RNReactNativePluginSettings.javaonandroid/app/src/main/java/compath and add the following:
  // paste the following

package com.app.myapp; // make sure this matches your package path on your mainApplication.java

import android.accessibilityservice.AccessibilityServiceInfo;
import android.app.Activity;
import android.content.Context;
import android.content.Intent;
import android.content.pm.ServiceInfo;
import android.os.Build;
import android.provider.Settings;
import android.view.accessibility.AccessibilityManager;
import android.view.inputmethod.InputMethodInfo;
import android.view.inputmethod.InputMethodManager;
import android.content.SharedPreferences;

import androidx.annotation.NonNull;
import androidx.annotation.RequiresApi;

import com.facebook.react.bridge.Callback;
import com.facebook.react.bridge.ReactApplicationContext;
import com.facebook.react.bridge.ReactContextBaseJavaModule;
import com.facebook.react.bridge.ReactMethod;

import java.util.List;

public class RNReactNativePluginSettings extends ReactContextBaseJavaModule {
    SharedPreferences sharedPreferences;

    RNReactNativePluginSettings(ReactApplicationContext context) {
        super(context);
        sharedPreferences = context.getSharedPreferences("kindred", context.MODE_PRIVATE);
    }

    @ReactMethod
    public void openAccessibilitySettings() {
        Activity currentActivity = getCurrentActivity();
        currentActivity.startActivity(new Intent(Settings.ACTION_ACCESSIBILITY_SETTINGS));
    }

    @ReactMethod
    public void isEnabled(Callback callback) {
        Activity currentActivity = getCurrentActivity();

        Boolean isEnabled = false;

        AccessibilityManager am = (AccessibilityManager) currentActivity.getSystemService(Context.ACCESSIBILITY_SERVICE);
        List<AccessibilityServiceInfo> enabledServices = am.getEnabledAccessibilityServiceList(AccessibilityServiceInfo.FEEDBACK_ALL_MASK);

        for (AccessibilityServiceInfo enabledService : enabledServices) {
            ServiceInfo enabledServiceInfo = enabledService.getResolveInfo().serviceInfo;
            if (enabledServiceInfo.packageName.equals(currentActivity.getPackageName()))
                isEnabled = true;
        }

        callback.invoke(null, isEnabled);
    }

    @ReactMethod
    public void setUserId(String userId) {
        sharedPreferences.edit().putString("KKUserId", userId).apply();
    }

    @NonNull
    @Override
    public String getName() {
        return "RNReactNativePluginSettings";
    }
}
- Create file
KindredPackage.javaonandroid/app/src/main/java/compath and add the following:
  // paste the following

package com.app.myapp; // make sure this matches your package path on your mainApplication.java

import androidx.annotation.NonNull;

import com.facebook.react.ReactPackage;
import com.facebook.react.bridge.NativeModule;
import com.facebook.react.bridge.ReactApplicationContext;
import com.facebook.react.uimanager.ViewManager;

import java.util.ArrayList;
import java.util.Collections;
import java.util.List;

public class KindredPackage implements ReactPackage {
    @NonNull
    @Override
    public List<NativeModule> createNativeModules(@NonNull ReactApplicationContext reactContext) {
        List<NativeModule> modules = new ArrayList<>();
        modules.add(new RNReactNativePluginSettings(reactContext));

        return modules;
    }

    @NonNull
    @Override
    public List<ViewManager> createViewManagers(@NonNull ReactApplicationContext reactContext) {
        return Collections.emptyList();
    }
}
- Update the
MainApplication.javaonandroid/app/src/main/java/compath and add the following:
// update the following

    @Override
    protected List<ReactPackage> getPackages() {
      @SuppressWarnings("UnnecessaryLocalVariable")
      List<ReactPackage> packages = new PackageList(this).getPackages();


      packages.add(new KindredPackage()); // Add this line

      List<ReactPackage> unimodules = Arrays.<ReactPackage>asList(new ModuleRegistryAdapter(mModuleRegistryProvider));
      packages.addAll(unimodules);

      return packages;
    }
React Native
Add a File KindredPluginSettings.ts to your project src
// Paste the following

import { NativeModules, Platform } from 'react-native';
const { RNReactNativePluginSettings } = NativeModules;

export default class KindredPluginSettings {

//Note(Android): Used to  open the settings on the android devices to allow users to be able to enable the Kindred SDK by enabling it on the accessibility service

  static async openPlugin() {
    if (Platform.OS === 'android') {
      RNReactNativePluginSettings.openAccessibilitySettings();
    }
  }

//Note(Android): Used to checks if the Kindred service has been enabled on a android device

  static async isEnabled() {
    return new Promise((resolve, reject) => {
      if (Platform.OS === 'android') {
        RNReactNativePluginSettings.isEnabled((errorCode: any, isEnabled: boolean) => {
          if (errorCode) {
            reject(errorCode);
          } else {
            resolve(isEnabled);
          }
        });
      } else {
        resolve(false);
      }
    });
  }

// Note(Required Android/iOS): Provide your own user ID or a unique identifier for the user for analytic purposes, you can provide the SDK with you own unique ID :

  static async setUserId(userID: string) {
    if (Platform.OS === 'android') {
      RNReactNativePluginSettings.setUserId(userID);
    } else {
      RNIKindredModule.setUserId(userID);
    }
  }

  //Note(optional iOS only): Once we track successful transactions for the user and they have earned some cashback, we present them with a popup that has a call to action back to the app. In order for this to function, you must provide us with the url scheme you have set for your app.

  static async setAppUrlScheme(urlScheme: string) {
       if (Platform.OS === 'ios') {
      RNIKindredModule.setUrlSchemeKey(urlScheme);
    }
  }

 //Note(optional iOS only): used to set the currency code for user, default value is 'USD'

 static async setUserCurrencyCode(currencyCode: string) {
    if (Platform.OS === 'ios') {
      RNIKindredModule.setUserCurrencyCode(currencyCode);
    }
  }

 //Note(optional iOS only): used to set the country code for user, default value is 'US'

 static async setUserCountryCode(countryCode: string) {
    if (Platform.OS === 'ios') {
      RNIKindredModule.setUserCountryCode(countryCode);
    }
  }


   // Note(optional iOS only):Show Earnings feature flag. You can turn the feature flag on/off . learn more about this feature flag on below

  static async setShowEarningsConfirmationMessage(enabled: boolean) {
    if (Platform.OS === 'ios') {
      RNIKindredModule.setShowEarningsConfirmationMessage(enabled);
    }
  }

  // Note(optional iOS only): Show cashback label feature flag. You can turn on/off the cashback label feature flag. learn more about this feature flag on below

  static async setShowCashbackLabel(enabled: boolean) {
    if (Platform.OS === 'ios') {
      RNIKindredModule.setShowCashbackLabel(enabled);
    }
  }

  // Note(optional iOS only): Show Earthmark feature flag. You can turn on/off the show Earthmark  feature flag. learn more about this feature flag on below

  static async setShowEarthmark(enabled: boolean) {
    if (Platform.OS === 'ios') {
      RNIKindredModule.setShowEarthmark(enabled);
    }
  }

  // Note(optional iOS only): Use Analytics feature flag.Use this if you would like to have analytics tracking turned on
  // NOTE: If you would like to opt in to analytics, you will also need to contact Kindred to ensure that your account is configured for analytics. Contact sdksupport@kindredteam.com
  // This allows Kindred to track analytics on the following:
  // 1. Extension installation and enabling
  // 2. Latest activity
  // 3. Deal activations
  // 4. Conversions

  static async setUseAnalytics(enabled: boolean) {
    if (Platform.OS === 'ios') {
      RNIKindredModule.setUseAnalytics(enabled);
    }
  }

  // Note(optional iOS only): Detecting if the extension was installed. This will return either a true or false value.
  // NOTE: You will need to follow the steps for enabling the App Groups in order to use this functionality.
  // One thing you may need to know is if your users have activated the extension. This is possible by using the following method for IOS and isEnabled for Android users:

  static async isExtensionFirstTimeInstall() {
    return new Promise((resolve, reject) => {
      if (Platform.OS === 'ios') {
        RNIKindredModule.isExtensionFirstTimeInstall(
          (isFirstTimeInstall: boolean) => {
            resolve(isFirstTimeInstall);
          },
        );
      } else {
        reject(false);
      }
    });
  }

}
To learn more about URL scheme, please visit: https://developer.apple.com/documentation/xcode/defining-a-custom-url-scheme-for-your-app
⚠️ Note Make sure you set a unique userId for your users using setUserId(userID: string) method
setUserId(userID: string) methodUsage Example
import React, {useCallback, useEffect, useState} from 'react';
import {
  AppState,
  Linking,
  Platform,
  SafeAreaView,
  StyleSheet,
  Text,
  TouchableOpacity,
  View,
} from 'react-native';
import KindredPluginSettings from './KindredPluginSettings';

const App = () => {
  const [uniqueID, setUniqueID] = useState('');
  const urlScheme = 'test2project';
  const [inactive, setInactive] = useState(false);
  const handleOnPress = async () => {
    if (Platform.OS === 'android') {
      await KindredPluginSettings.openPlugin();
    } else {
      const instructionsLink =
        'https://sdk.kindred.co/plugin-activation?origin=' + urlScheme;
      Linking.canOpenURL(instructionsLink).then(supported => {
        if (supported) {
          Linking.openURL(instructionsLink);
        }
      });
    }
  };

  useEffect(() => {
    AppState.addEventListener('change', handleAppStateChange);
    setUniqueID('TEST_USER_1');
  }, []);

  const handleAppStateChange = useCallback(
    (change: string) => {
      if (change === 'inactive' || change === 'background') {
        setInactive(true);
        return;
      }
      if (change === 'active' && inactive) {
        setInactive(false);
        if (Platform.OS === 'android') {
          KindredPluginSettings.isEnabled().then(isEnabled => {
            if (isEnabled) {
              KindredPluginSettings.setUserId(uniqueID);
            }
          });
        } else {
          KindredPluginSettings.setUserId(uniqueID);
          KindredPluginSettings.setAppUrlScheme(urlScheme);
          KindredPluginSettings.setUserCountryCode('US');
          KindredPluginSettings.setUserCurrencyCode('USD');

        }
      }
    },
    [inactive, uniqueID],
  );

  return (
    <SafeAreaView>
      <View>
        <Text>Welcome to plugin test interface</Text>
        <TouchableOpacity style={styles.button} onPress={() => handleOnPress()}>
          <Text style={styles.text}>Activate Plugin</Text>
        </TouchableOpacity>
      </View>
    </SafeAreaView>
  );
};

const styles = StyleSheet.create({
  highlight: {
    fontWeight: '700',
  },
  text: {
    color: 'white',
    textAlign: 'center',
    fontSize: 30,
  },
  button: {
    backgroundColor: 'blue',
    width: '70%',
    height: 50,
    borderRadius: 20,
  },
});

export default App;
Verify the solution
- Open Browser/Safari for iOS
- Visit your favourite brands
Try visiting Nike, Adidas or John Lewis
What is "Show Earnings" feature flag?
If you would like us to popup to the user whenever they've made any cash back or donated to a cause, you can set this feature flag on when setting up the configuration on the DealsAccessibilityService for Android and using KindredPluginSettings.setShowEarningsConfirmationMessage(true) for IOS.

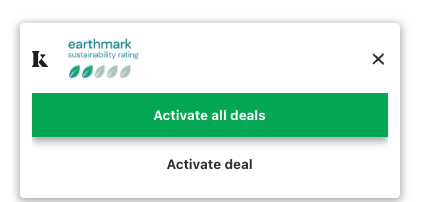
What is "EarthMark" feature flag?
Earthmark have developed a rating system to show how "green" retailers really are. Earthmark's rating system will now be highlighted within the Kindred technology so partners can help their users make more informed choices to shop sustainably.
What is "Show Cashback label" feature flag?
You can turn on/off the cashback label feature flag. Having it on means that when we detect a cashback deal, the user will be notified through the popups with text indicating how much cashback they would be earning. Having the feature off means that there will not be any reference to cashback or cashback amount instead, will reference a deal.
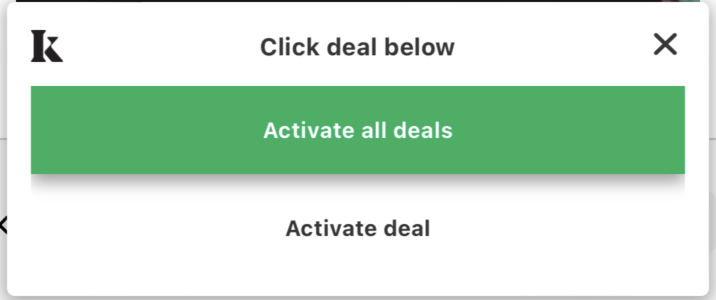
Feature flag off
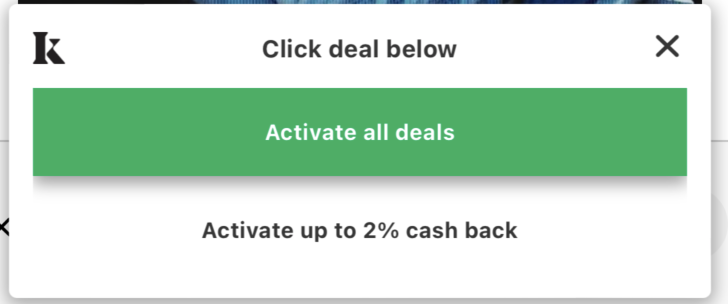
Feature flag on
License Agreement: https://event.kindred.co/licensing-terms-and-conditions
Updated almost 2 years ago